
Translating Product Size Ranges: Keep From–To Values Distinct From Dimensions
Before translating numbers in a product graphic, identify the relationship between them. A length from 10 to 12 cm is different from dimensions of 10 × 12 cm. Preserve that relationship in the heading, symbols and translated wording, rather than checking only that both numbers survived.
Ask what the two numbers describe
Start with the approved specification for the exact model and option in the photograph. Record the item being measured, the units, and whether the figures describe an interval, two dimensions, or separate selectable sizes. A dash in an unclear supplier image is not enough evidence to choose among those meanings.
For an editorial example, imagine a fictional strap whose stated length range is 10–12 cm, and a separate fictional label whose width and height are 10 × 12 cm. These invented records illustrate different relationships; they are not real specifications or a unit-conversion example.
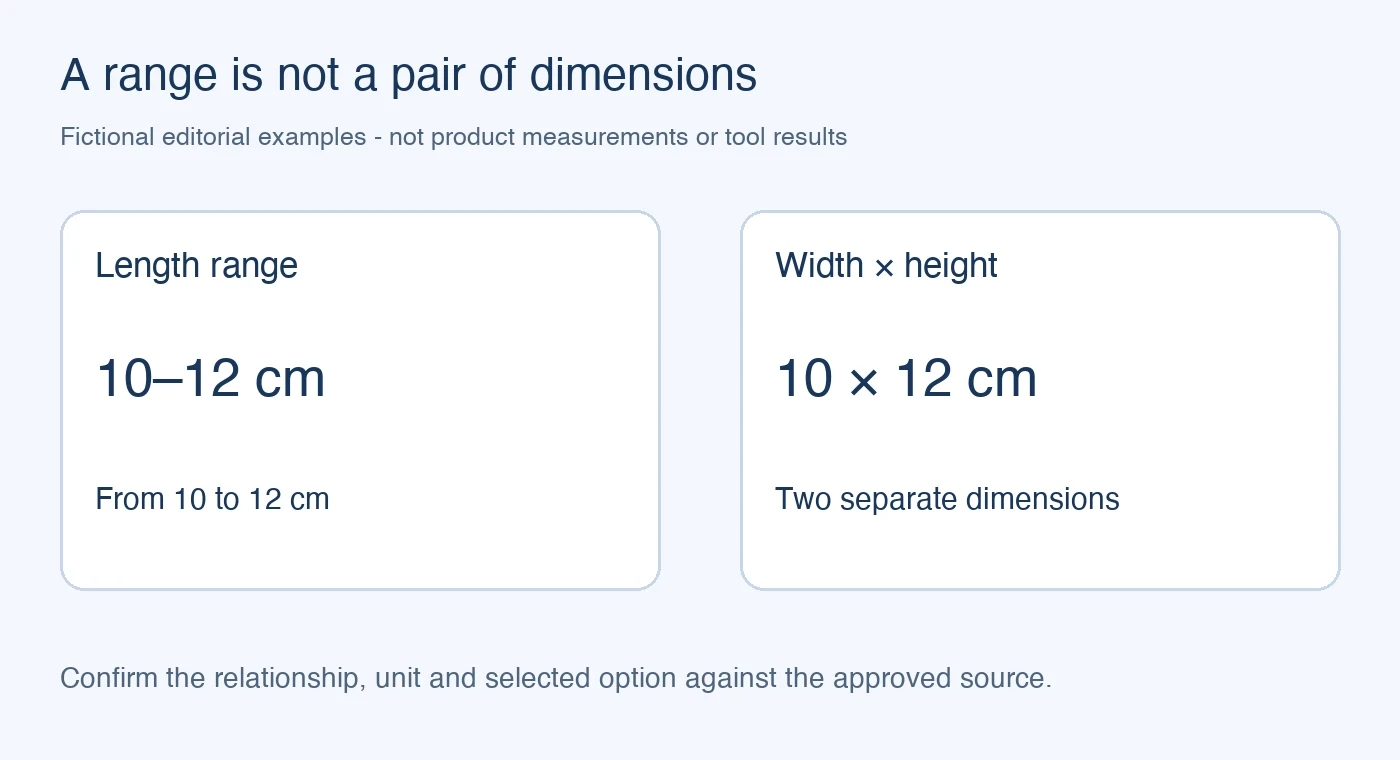
If the supplier record is ambiguous, ask the product owner to clarify it. Do not turn an interval into two selectable options or call it adjustable unless the product information supports that wording.
Translate the heading as well as the figures
A short heading such as “length range” or “width × height” tells readers how to interpret the values. Keep the translated heading close to its figures. If two measurements have separate labels or units in the source, retain the information needed to identify each one.
The PicTech AI image translation page describes translating image text and reviewing its placement. The tool can assist with text and layout; it does not establish which relationship the supplier intended. Use the approved record to review the result.
Review separators without changing their meaning
Check the dash, multiplication sign, slash, decimal marks and units individually. A faint separator may be difficult to distinguish in a small preview. Compare the original and editable text before deciding whether the issue is missing content or an unclear visual arrangement.
Do not replace every separator with the same character to make a graphic look consistent. An interval, a pair of dimensions and a list of options need not use the same notation. Where space permits, a brief explicit label can remove ambiguity more effectively than a tiny symbol alone.
Keep annotations attached to the right value
Inspect arrows, captions and footnotes along with the numbers. A note applying to one dimension should not appear to describe the entire range after text boxes move. The PicTech AI user guide explains comparing and editing results before export; use that comparison to follow each label back to its source.
Open the downloaded file at full size and at the intended storefront width. Confirm that the heading and separator remain distinguishable. Avoid shrinking essential labels merely to fit a long translation into the original space.
Approve the graphic with the selected product option
Compare the final graphic with the current option name and written specification on the product page. Resolve conflicts before publishing instead of making one unverified field match another. Retain the source record, its revision and the approved export so the next edit starts from the same meaning.
This review checks whether the localized graphic communicates the documented relationship. It does not verify the underlying measurement, product compatibility or a supplier's claim.